EV Green Charging
Who has not dreamt of an automated EV charging control to use exactly the amount of energy that is produced by the rooftop PV system and not consumed by the household devices? Here is a short summary on how I built my solution using Home Assistant, an ESP32 for smart metering and a Keba wallbox. This blog entry will provide an overview about the work done without going too much into technical details. If you want to reproduce a similar solution, I advise you to follow the reference links.
Smart Metering with an ESP32
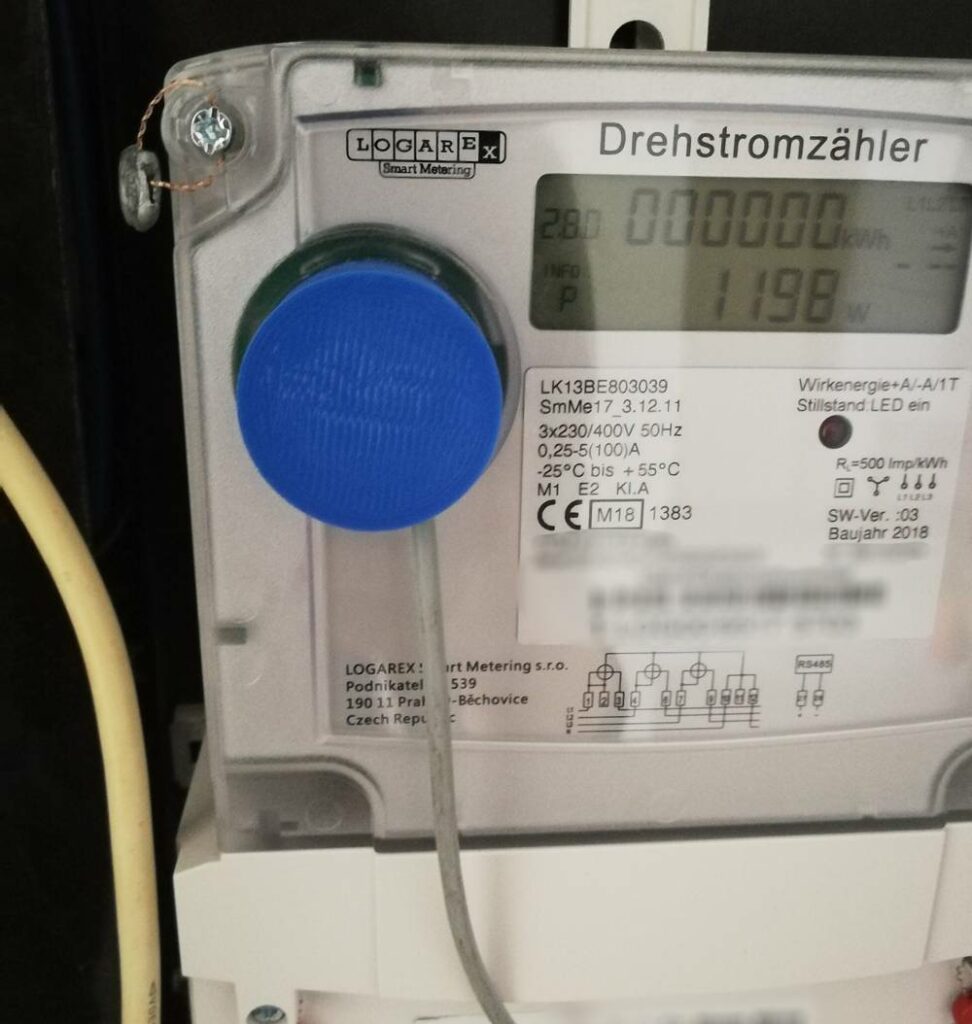
Some time ago, the energy meters for both the PV system and the household were exchanged to Logarex LK13BE8030x9. A short Google search points to the manual (German only) hosted by Stadtwerke Burgdorf. The manual unveils an unidirectional extended data mode on the optical connection. To enable this extended data mode (more detailed data including current and voltage on each phase), a PIN request from the metering point operator (in this case Bayernwerk Netz GmbH) was required, which worked flawlessly via a short phone call. The extended data contains the following data set: Some starting bytes, several key-value pairs (OBIS numbers) and final bytes. The data is sent (pushed) from the smart meter every 3-4 seconds (!), which provides a near real-time update of current state of the energy system on all three phases.
Extended data set from the Logarex smart meter
/LOG5LK13BE803049
<ACK>050
<STX>
1-0:96.1.0*255(001LOG0064800017)
1-0:1.8.0*255(000000.4392*kWh)
1-0:1.8.1*255(000000.0000*kWh)
1-0:1.8.2*255(000000.4392*kWh)
1-0:2.8.0*255(000000.8322*kWh)
1-0:16.7.0*255(000000*W)
1-0:32.7.0*255(000.0*V)
1-0:52.7.0*255(000.0*V)
1-0:72.7.0*255(229.9*V)
1-0:31.7.0*255(000.00*A)
1-0:51.7.0*255(000.00*A)
1-0:71.7.0*255(000.03*A)
1-0:81.7.1*255(000*deg)
1-0:81.7.2*255(000*deg)
1-0:81.7.4*255(000*deg)
1-0:81.7.15*255(000*deg)
1-0:81.7.26*255(000*deg)
1-0:14.7.0*255(49.9*Hz)
1-0:1.8.0*96(00000.0*kWh)
1-0:1.8.0*97(00000.0*kWh)
1-0:1.8.0*98(00000.0*kWh)
1-0:1.8.0*99(00000.0*kWh)
1-0:1.8.0*100(00000.4*kWh)
1-0:0.2.0*255(ver.03,EF8C,20170504)
1-0:96.90.2*255(0C69)
1-0:97.97.0*255(00000000)
!
<ETX>
<BCC=0x63>
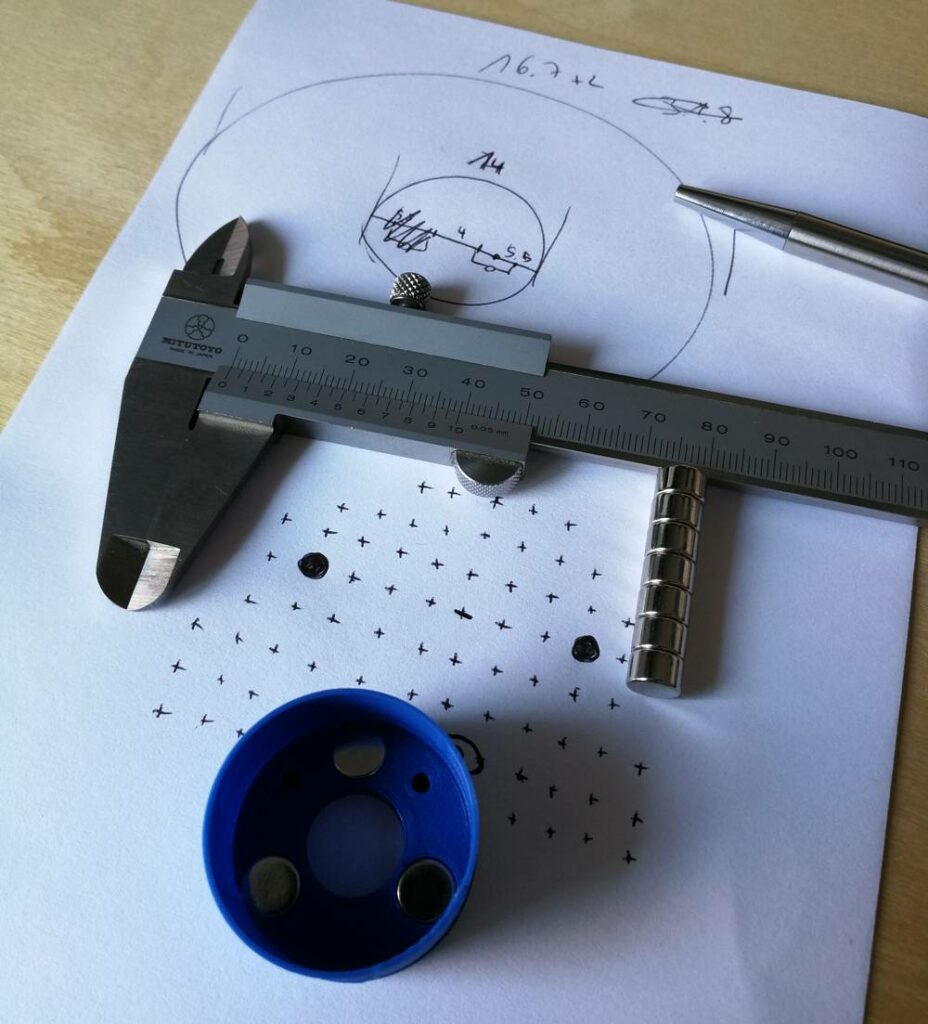
<BCC=0x63>After testing around with an ESP8266 and coding a prototype based on Arduino and the experience from msxfaq.de (very helpful documentation about the D0 connection and SML), I noticed that one ESP8266 core for two smart meters connected via software UART and additional WiFi connection pushing the decoded values to a MQTT server did not provide sufficient reliability. Thus, an ESP32, which has three built-in hardware UART controllers and two processing cores (one for WiFi, the other one for the Arduino program), provided a solid solution. The final IR sensor (only receiving part, as the Logarex meter does only support unidirectional communication on optical connection so far) is based on the one engineered by volkszaehler.org.
The data is then pushed to an MQTT server and integrated in Home Assistant using the MQTT sensor component. Up to date values are now in Home Assistant and are further processed to calculate the actual current flow on every phase (load minus PV production) and used a basis for controlling the EV charging operation (more on that later).
Keba Wallbox Integration
Back then when I started with the green charging project, there was no Keba integration in Home Assistant out there (my goal was to use Home Assistant as I already have a lot of other IoT stuff managed on this plattform). Luckily the Keba wallboxes provide a UDP interface for easy monitor and control, which is well documented. So I created an integration for Home Assistant, which is finally part of the Home Assistant core starting from version 0.98 (see Home Assistant documentation) and still maintained by me. During development, reverse engineering the official BMW Wallbox app (there is a fast polling interval after sending a command to the wallbox in order to get a faster feedback on the measurement values) and following the UDP programming manual from Keba were helpful steps. If you want to use the Keba integration for your own project, now you just have to add the following configuration.
# Example configuration.yaml entry
keba:
  host: IP_OF_YOUR_KEBA_WALLBOX
Home Assistant Automations
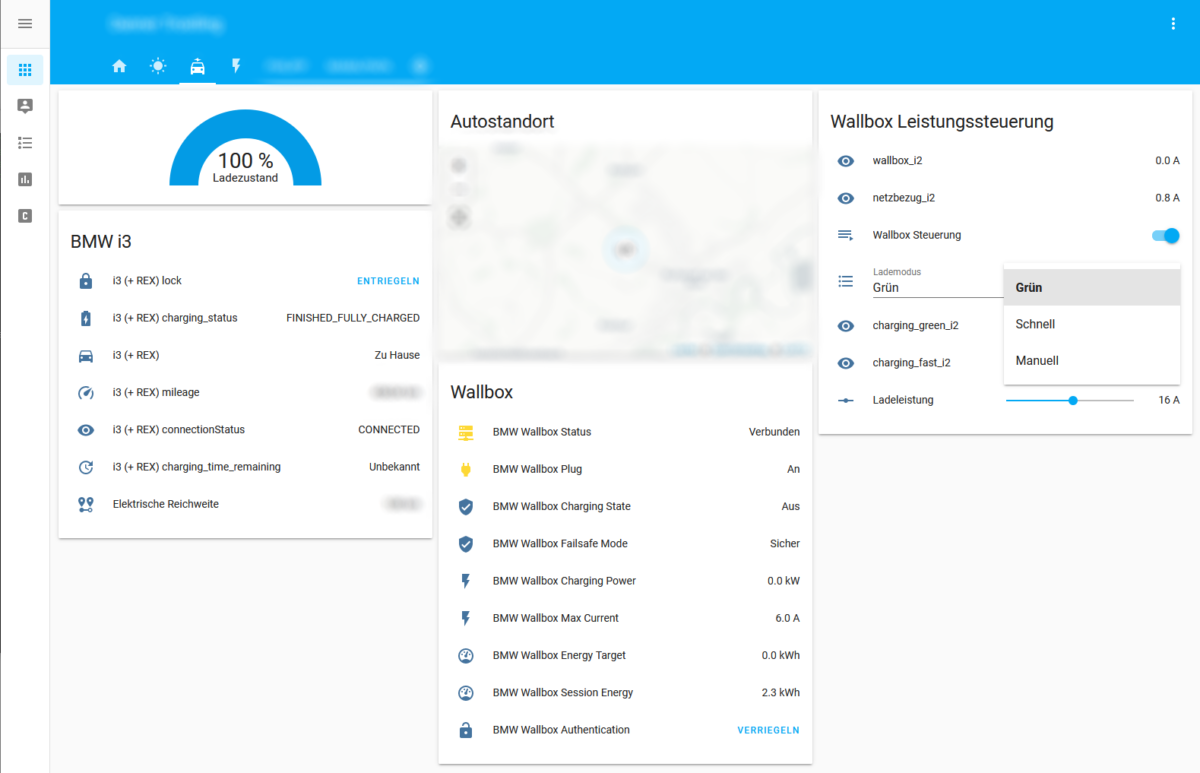
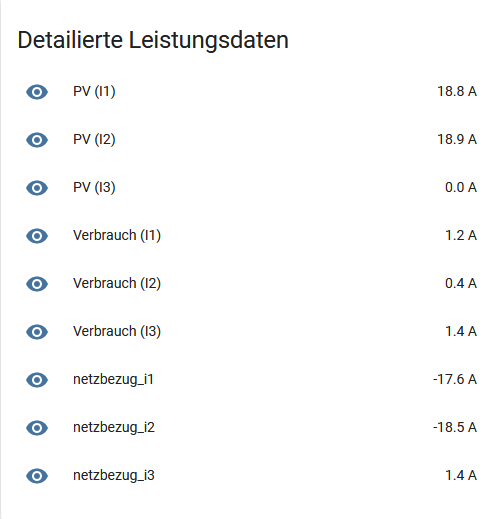
As you already can guess from the dashboard screenshot above, I have not only integrated a „green“ but actually a set of different charging modes:
- manual: setting the charging speed (current) with a slider
- fast: maximum charging current without breaking the fuses
- green: charging current is the current from the PV system minus household loads but at least 6 A so that the charging process does not stop
- extra green: same as green charging but stopping the charging process if the remaining current is below 6 A
With these four charging modes all my requirements can be satisfied. Fast charging is for limited charging time, green charging charges as green as possible but I will have a fully charged car the next morning and extra green for weekends, when I have time to split the charging process even to multiple days when the weather is not so nice.
All charging modes are implemented via a Home Assistant Automation that triggers either when the charging mode changes, the manual charging current slider is moved or the meter value changes (my BMW i3 has a single phase charger, thus only phase 2 is considered).
- id: 'XYZ'
  alias: Wallbox Control
  description: ''
  trigger:
  - entity_id: sensor.netzbezug_i2
    platform: state
  - entity_id: input_select.charging_mode
    platform: state
  - entity_id: input_number.charging_mode_manual
    platform: state
  condition: []
  action:
  - service: script.set_charging_mode
The referenced Home Assistant script (set_charging_mode) executes the keba service call using the current value depending on the selected charging mode. The current values are calculated using template sensors and are always up to date.
set_charging_mode:
  alias: Set Charging Mode
  sequence:
  - data_template:
      current: >
        {% if is_state("input_select.charging_mode", "Extragrün") -%}
          {{ states.sensor.charging_extra_green_i2.state | float }}
        {%- elif is_state("input_select.charging_mode", "Grün") -%}
          {{ states.sensor.charging_green_i2.state | float }}
        {%- elif is_state("input_select.charging_mode", "Schnell") -%}
          {{ states.sensor.charging_fast_i2.state | float }}
        {%- elif is_state("input_select.charging_mode", "Manuell") -%}
          {{ states.input_number.charging_mode_manual.state | float }}
        {%- endif %}
    service: keba.set_current
Finally one could enable the failsafe mode at the Keba Wallbox, which ensures that the charging current will be reset to a certain minimum in case there is no new update via UDP.
Test Results
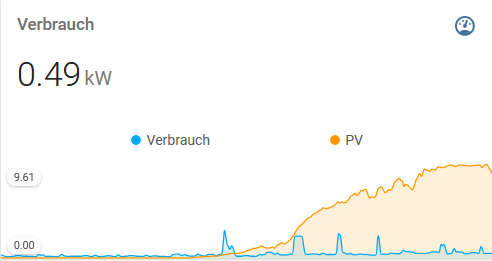
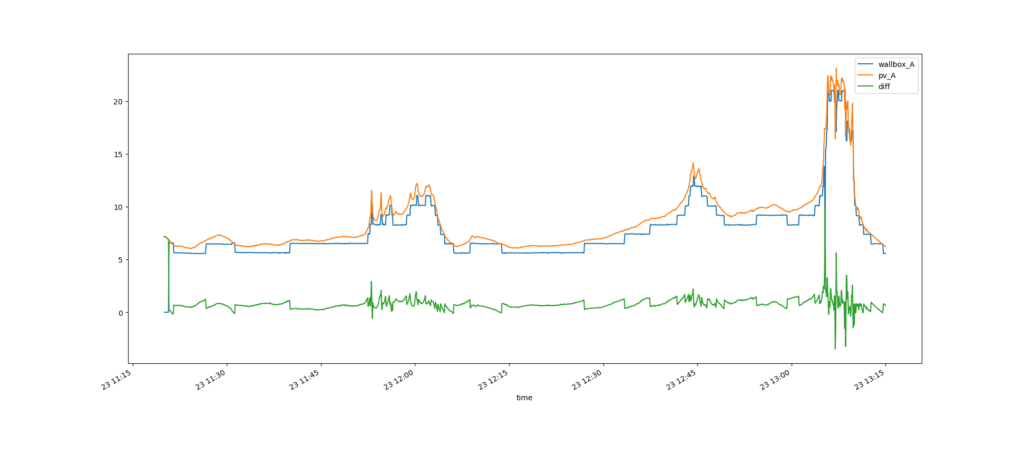
Some time ago I tested the effectiveness of the control schema on a cloudy day. In the figure below, the current from the PV (orange) and the charging current (blue) are shown. In addition, the error (green) is visualized. In this short test period, 3.412 kWh were charged, while 3.765 kWh have been produced by the PV system. Having a deeper look on the relation over time, PV overproduction of 0.356 kWh (10.43%) and underproduction of 0.003 kWh (0.009%) can be observed. This can be explained by the technical limitation that only integer ampere steps can be forwarded to the EV and that there is still a very short delay until the commands are executed. All in all, charging with 99.91% green energy is a satisfying result!
Summary
With low cost hardware (ESP32, IR sensor parts) and bunch of open source software (Arduino, Home Assistant), the Keba Wallbox is now following predefined charging modes. More than 99% of the energy in the charging process are served from the PV production in the green charging mode and blowing the main fuses is prevented. Just one question remains: How long will it take to get such a system as a product for a reasonable price for those who cannot built their own?